Cooling time is the single largest contributor to injection molding cycle time, accounting for 60 to 70 percent of the total cycle on most production programs. Reducing it — even by 10 to 15 percent — can translate to hundreds of thousands of dollars in annual throughput gains on a high-volume tool. Yet many engineers still set cooling time by trial and error rather than by calculation.
This guide gives you the complete engineering framework for understanding, calculating, and reducing cooling time in injection molding. We cover the fundamental cooling time formula, explain every variable, show why cooling time is proportional to wall thickness squared, provide thermal diffusivity data for the seven most common resins, walk through two detailed calculator examples, and present a reference table of pre-calculated cooling times across thicknesses and materials. The final sections cover the eight most effective strategies to reduce cooling time, including conformal cooling, channel design principles, and when to move from hand calculation to full mold simulation.
1. Why Cooling Time Dominates Injection Molding Cycle Time

A typical injection molding cycle has four phases: injection, packing and holding, cooling, and mold open/eject/close. The time breakdown for a standard production part looks like this:
| Cycle Phase | Typical Duration | % of Total Cycle | Reducibility |
|---|---|---|---|
| Injection | 0.5–3 s | 3–10% | Limited (material limited) |
| Packing & Holding | 2–8 s | 8–18% | Moderate (shrinkage limited) |
| Cooling | 10–60 s | 60–70% | High — primary target |
| Mold Open / Eject / Close | 2–5 s | 5–12% | Low (mechanical limits) |
The dominance of cooling time is a direct consequence of heat transfer physics. Injection molding puts molten plastic into a steel mold at temperatures of 200 to 320 degrees C. The part cannot be safely ejected until its core temperature drops below the material's heat distortion temperature — for most engineering resins, this means extracting a large quantity of heat in a short time. The rate of heat extraction is limited by how quickly the mold can carry heat away through its cooling circuits.
On a 30-second cycle, cooling typically accounts for 18 to 21 seconds. Reducing cooling time by 30 percent — from 20 seconds to 14 seconds — cuts total cycle time by 20 percent and increases throughput by 25 percent without changing anything else about the process.
This is why cooling time in injection molding is the first target for any cycle time reduction program. Small improvements in cooling yield large improvements in output. And because the improvements are permanent — built into the mold — they compound across every shot the tool ever runs.
2. The Injection Molding Cooling Time Formula — Complete Breakdown
The standard engineering formula for cooling time in injection molding is derived from the analytical solution to one-dimensional heat conduction through a flat plate. It is the foundation for all injection molding cooling time calculators and is valid for the majority of injection-molded parts.
Understanding Each Variable
Wall thickness (s): This is the most critical variable in the formula because it appears as s-squared. Use the maximum nominal wall thickness of the part — not the average. If a part has a 2 mm nominal wall but a 3.5 mm boss, the boss controls cooling time. Every millimeter of wall thickness matters disproportionately because of the squared relationship.
Thermal diffusivity (α): This is a material property that quantifies how quickly heat moves through a material. It is the ratio of thermal conductivity to the product of density and specific heat: α = k / (ρ × Cp). Resins with higher thermal diffusivity cool faster. See Section 4 for a full table of values for common materials.
Melt temperature (Tm): The temperature of the plastic entering the mold. This comes from the machine barrel setpoint and is specified on the material data sheet. Running at the lower end of the recommended melt temperature range reduces the total heat content that must be extracted, modestly reducing cooling time.
Mold wall temperature (Tw): The controlled temperature at the mold cavity surface, set by the coolant temperature and flow rate. Lower mold wall temperature means a larger temperature driving force for heat extraction, which reduces cooling time. However, some materials require elevated mold temperatures to achieve proper crystallinity or surface finish. See Section 7 for the quantitative effect of mold temperature on cooling time.
Ejection temperature (Te): The maximum allowable core temperature at the time of ejection. Below this temperature, the part is rigid enough to survive ejection without distortion. This value is material-dependent — it is typically 10 to 30 degrees C below the heat distortion temperature (HDT) under load. Setting Te too high leads to part distortion and warpage; setting it too low adds unnecessary cooling time.
The Logarithmic Term — What It Means
The natural logarithm term in the cooling time formula, ln((8/π²) × (Tm − Tw)/(Te − Tw)), captures the ratio of the initial temperature difference to the remaining allowable temperature difference at ejection. Expressed simply: it measures how much of the melt's heat you need to remove before ejection. A larger initial temperature difference (hotter melt or colder mold) increases this term. A tighter ejection criterion (lower Te, i.e., requiring the part to cool more completely) also increases this term.
For most practical injection molding scenarios, the logarithmic term falls in the range of 1.5 to 2.5. This means the "thermal" component of the formula changes relatively slowly — a 20% change in the temperature ratio shifts cooling time by only 10 to 15%. This is in stark contrast to the s-squared term, where a 20% increase in wall thickness increases cooling time by 44%. Wall thickness control is always the highest-leverage variable.
3. Why Injection Molding Cooling Time Is Proportional to Wall Thickness Squared
The relationship that injection molding cooling time is proportional to wall thickness squared (written as t ∝ s²) is the single most important quantitative fact in injection mold thermal engineering. Understanding why it is true — and what it means in practice — changes how you think about part design and mold investment decisions.
The Physics Behind t ∝ s²
When molten plastic fills a mold cavity, heat must conduct from the center of the wall outward to the cooled mold surface. The time required for this conduction process scales with the square of the distance, not linearly. This is Fourier's law of heat conduction applied to a transient problem: the time for the thermal front to reach the center of a wall of thickness s/2 (heat conducts from both surfaces simultaneously) scales as (s/2)² / α, which simplifies to s² / (4α).
The full formula includes the logarithmic correction term, but the core scaling relationship is always t ∝ s² / α. You cannot escape this physics. It applies regardless of the cooling system geometry, coolant temperature, or mold material.
Practical Consequences: The Doubling Rule
If a 2 mm wall cools in 6 seconds, a 4 mm wall (same material, same mold temperature) cools in 24 seconds — not 12.
If a 1.5 mm wall cools in 3.5 seconds, a 3 mm wall cools in 14 seconds — not 7.
This scaling applies to any resin, any mold temperature, any cooling system. It is a fundamental consequence of heat conduction physics and cannot be designed around — only by changing the wall thickness itself.
The table below illustrates the s-squared scaling for a PP part (melt temp 230°C, mold temp 40°C, ejection temp 100°C, α = 0.087 × 10² m²/s):
| Wall Thickness | Calculated Cooling Time | Relative to 2 mm | Thickness Ratio² |
|---|---|---|---|
| 1.0 mm | 1.7 s | 0.25× | (1/2)² = 0.25× ✓ |
| 1.5 mm | 3.8 s | 0.56× | (1.5/2)² = 0.56× ✓ |
| 2.0 mm | 6.8 s | 1.00× (baseline) | 1.00× |
| 2.5 mm | 10.6 s | 1.56× | (2.5/2)² = 1.56× ✓ |
| 3.0 mm | 15.3 s | 2.25× | (3/2)² = 2.25× ✓ |
| 4.0 mm | 27.2 s | 4.00× | (4/2)² = 4.00× ✓ |
| 5.0 mm | 42.5 s | 6.25× | (5/2)² = 6.25× ✓ |
The third and fourth columns confirm the s-squared law precisely. This means the most powerful single action a product designer can take to reduce injection molding cooling time is to reduce maximum wall thickness. A wall design change from 3 mm to 2 mm — achievable through coring, ribbing, or hollow sections — reduces cooling time by 56 percent and costs nothing in tooling investment.
4. Thermal Diffusivity Values for Common Injection Molding Resins
Thermal diffusivity (α) is the material property that appears in every injection molding cooling time formula. It determines how quickly a material can transport heat — higher diffusivity means faster cooling for the same thickness. The table below provides thermal diffusivity values and related thermal properties for the seven most common injection molding resins.
| Resin | α (×10² m²/s) | Melt Temp Range (°C) | Recommended Tw (°C) | Typical Te (°C) | Relative Cooling Speed |
|---|---|---|---|---|---|
| PP (Polypropylene) | 0.087 | 200–260 | 20–60 | 90–110 | Moderate |
| HDPE (High-Density PE) | 0.118 | 200–260 | 20–50 | 80–100 | Fast |
| PS (Polystyrene) | 0.107 | 180–280 | 20–60 | 70–90 | Fast |
| ABS (Acrylonitrile Butadiene Styrene) | 0.100 | 200–270 | 40–80 | 80–100 | Moderate |
| PC (Polycarbonate) | 0.115 | 270–320 | 80–120 | 120–140 | Moderate (but needs hot mold) |
| PA66 (Nylon 66) | 0.090 | 260–300 | 60–100 | 100–130 | Moderate |
| POM (Acetal / Delrin) | 0.095 | 185–225 | 60–100 | 100–130 | Moderate |
| PMMA (Acrylic) | 0.081 | 230–280 | 50–80 | 75–95 | Slow |
Notes: Values are for unfilled grades; glass-fiber reinforcement typically increases thermal diffusivity 5 to 15 percent, moderately reducing cooling time. Thermal diffusivity values are temperature-dependent; values listed are averages across the solidification range. For precision calculations, use material supplier data sheets or Moldflow material database values.
Comparing extremes: HDPE (α = 0.118) cools approximately 45 percent faster than PMMA (α = 0.081) at the same wall thickness, temperature differential, and mold conditions. This difference is significant but substantially smaller than the effect of even modest changes in wall thickness — confirming again that wall thickness is the dominant variable in cooling time in injection molding.
5. Step-by-Step Cooling Time Calculator Examples
The following worked examples show how to calculate cooling time in injection molding using the standard formula. Both examples use realistic production parameters.
Part: Door panel sub-component, polypropylene (PP copolymer)
Maximum wall thickness s: 3.0 mm = 0.003 m (at rib base)
Thermal diffusivity α (PP): 0.087 × 10² m²/s = 8.7 × 10² m²/s
Melt temperature Tm: 230°C
Mold wall temperature Tw: 40°C
Ejection temperature Te: 100°C
Step 1 — Calculate the s-squared term:
s² / (π² × α) = (0.003)² / (9.8696 × 8.7 × 10²) = 9 × 10² / 8.587 × 10² = 10.48 s
Step 2 — Calculate the logarithmic term:
(8/π²) × (Tm − Tw)/(Te − Tw) = 0.8106 × (230 − 40)/(100 − 40) = 0.8106 × 190/60 = 0.8106 × 3.167 = 2.567
ln(2.567) = 0.943
Step 3 — Multiply:
t = 10.48 × 0.943 = 9.88 seconds
Calculated cooling time: ~10 seconds for 3 mm PP wall
Note: In practice, add 15–25% safety margin to account for non-ideal conditions, giving a set cooling time of 12–13 seconds. Total cycle time including all phases: approximately 18–20 seconds.
Part: Optical lens housing, polycarbonate (PC)
Maximum wall thickness s: 2.0 mm = 0.002 m
Thermal diffusivity α (PC): 0.115 × 10² m²/s = 1.15 × 10² m²/s
Melt temperature Tm: 290°C
Mold wall temperature Tw: 90°C (elevated for optical quality surface)
Ejection temperature Te: 130°C
Step 1 — s-squared term:
s² / (π² × α) = (0.002)² / (9.8696 × 1.15 × 10²) = 4 × 10² / 1.135 × 10² = 3.524 s
Step 2 — Logarithmic term:
(8/π²) × (290 − 90)/(130 − 90) = 0.8106 × 200/40 = 0.8106 × 5.0 = 4.053
ln(4.053) = 1.400
Step 3 — Multiply:
t = 3.524 × 1.400 = 4.93 seconds
Calculated cooling time: ~5 seconds for 2 mm PC wall at 90°C mold temperature
Note: The elevated mold temperature (90°C vs. typical 40°C) reduces the driving force for heat extraction, resulting in a longer cooling time relative to what the wall thickness and diffusivity alone would suggest. This illustrates the temperature sensitivity analyzed in Section 7.
Using an Injection Molding Cooling Time Calculator
While the hand calculation above is straightforward, most production engineers use a spreadsheet-based injection molding cooling time calculator or the Moldflow/Moldex3D built-in calculator for routine work. The key inputs for any cooling time calculator are the same: wall thickness, thermal diffusivity (α), melt temperature, mold wall temperature, and ejection temperature. The formula itself is always the same fundamental equation shown above.
For walls that are not flat plates — thick cylindrical sections, hemispheres, thick bosses — the flat-plate formula overestimates cooling time. Cylindrical sections cool from the outside surface only and are governed by the Bessel function solution, which gives somewhat shorter cooling times. For most engineering applications, the flat-plate formula used with the maximum wall half-thickness provides a conservative and useful estimate.
6. Injection Molding Cooling Time Reference Table
The table below provides pre-calculated cooling times for common resin and wall thickness combinations, using the standard injection molding cooling time formula with typical mid-range processing conditions for each material. Use this as a quick reference for preliminary cycle time estimation.
Assumptions: Melt temperatures at midpoint of recommended range; Tw and Te at typical mid-range recommended values for each resin; flat-plate geometry; no safety factor applied.
| Wall Thickness | PP (s) | HDPE (s) | ABS (s) | PC (s) | PA66 (s) | POM (s) | PMMA (s) |
|---|---|---|---|---|---|---|---|
| 1.0 mm | 1.1 | 0.8 | 1.4 | 1.3 | 1.4 | 1.3 | 2.0 |
| 1.5 mm | 2.5 | 1.9 | 3.2 | 2.9 | 3.2 | 2.9 | 4.5 |
| 2.0 mm | 4.4 | 3.3 | 5.6 | 5.1 | 5.6 | 5.1 | 7.9 |
| 2.5 mm | 6.9 | 5.2 | 8.7 | 8.0 | 8.8 | 7.9 | 12.4 |
| 3.0 mm | 9.9 | 7.5 | 12.6 | 11.5 | 12.6 | 11.5 | 17.9 |
| 3.5 mm | 13.5 | 10.2 | 17.1 | 15.6 | 17.2 | 15.6 | 24.3 |
| 4.0 mm | 17.6 | 13.3 | 22.3 | 20.4 | 22.5 | 20.4 | 31.8 |
| 5.0 mm | 27.5 | 20.8 | 34.8 | 31.9 | 35.1 | 31.9 | 49.6 |
| 6.0 mm | 39.6 | 29.9 | 50.2 | 45.9 | 50.6 | 45.9 | 71.5 |
Add 15 to 25 percent to these calculated values for actual production cycle time settings, to account for non-ideal channel layouts, process variability, and part geometry factors. For ABS and PA66 at 3 mm wall thickness, the calculated baseline cooling time of 12 to 13 seconds corresponds to a production set cooling time of 15 to 16 seconds, and a total cycle time of approximately 22 to 25 seconds depending on injection and hold time.
7. How Mold Temperature and Coolant Temperature Affect Cooling Time
Mold wall temperature (Tw) and the coolant temperature that produces it are the two most directly controllable parameters in the cooling time formula once a mold is built. Understanding their quantitative effect on cooling time in injection molding is essential for process optimization.
Effect of Mold Wall Temperature on Cooling Time
Consider how mold wall temperature (Tw) appears in the cooling time formula. It enters twice: in the denominator of (Tm − Tw) / (Te − Tw). As Tw increases (warmer mold), the numerator (Tm − Tw) decreases but the denominator (Te − Tw) also decreases, and the ratio increases — meaning the logarithm increases and cooling time increases. The relationship is nonlinear, but the practical guideline is:
For PP at 3 mm, increasing Tw from 30°C to 60°C (a realistic range for process variation) increases cooling time from approximately 8.5 s to 12.3 s — a 45% increase for a 30°C mold temperature difference. This explains why mold temperature control accuracy matters so much for cycle time consistency. A thermoregulator holding mold temperature to ±2°C will show far less cycle variation than a simple water supply line holding ±10°C.
Effect of Coolant Temperature on Cooling Time
Coolant temperature determines mold wall temperature only in combination with flow rate and channel geometry. A colder coolant in the same channel layout produces a lower mold wall temperature and therefore shorter cooling time. The relationship between coolant temperature and mold wall temperature depends on the heat transfer coefficient (h) at the channel wall:
Mold surface temperature ≈ Coolant temperature + Q / (h × A), where Q is heat flux and A is channel surface area. For typical steel molds with 10 mm diameter channels and turbulent flow (Re > 10,000), h ranges from 5,000 to 15,000 W/m²·K, meaning the mold surface temperature is typically 2 to 10 degrees C above coolant temperature for moderate heat fluxes.
This means that for well-designed cooling circuits, reducing coolant temperature by 10°C reduces mold wall temperature by approximately 8 to 10°C, which in turn reduces cooling time by 8 to 15%. Chilled water at 10°C versus tap water at 25°C can therefore cut cooling time by 12 to 25% — a significant and inexpensive process improvement on existing tools.
When High Mold Temperature Is Required
Some materials require elevated mold temperatures to achieve proper crystallinity, surface quality, or fiber orientation. PA66-GF30 (glass-filled nylon) requires Tw of 80 to 100°C for proper crystallinity and strength. PC for optical parts requires 80 to 120°C for surface quality. PPS and PEEK require 150 to 200°C. For these materials, it is not possible to simply lower mold temperature to reduce cooling time. Instead, other strategies must be used — particularly optimized conformal cooling channel design that maximizes heat extraction rate at the required mold temperature.
8. Eight Ways to Reduce Cooling Time in Injection Molding
Once you have calculated your baseline cooling time and identified it as the dominant cycle time driver, the following eight strategies offer the highest practical impact for reducing cooling time in injection molding. They are ordered from highest typical impact to lowest, though the best choice for your program depends on part geometry, material, volume, and tooling budget.
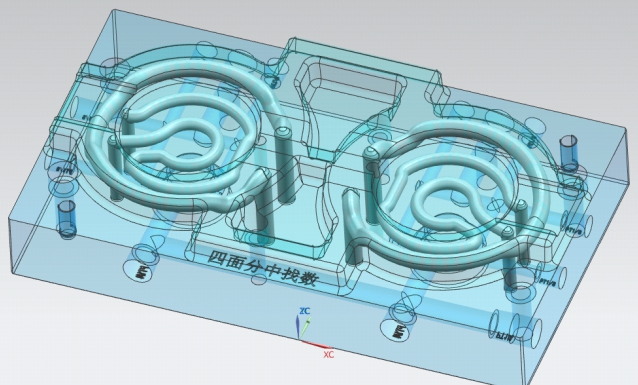
Conformal cooling channels are 3D-printed directly into the mold insert, following the part surface contour at a uniform distance of 4 to 8 mm. Unlike conventional straight-drilled channels that cannot reach deep ribs, curved surfaces, or complex geometry, conformal channels maintain uniform heat extraction across the entire cavity surface.
The mechanism is straightforward: conventional cooling creates mold surface temperature variations of 15 to 30°C across a complex part. These hot spots — at rib bases, boss intersections, and deep cores — force the molder to extend cooling time until even the hottest area solidifies. Conformal cooling reduces temperature variation to 2 to 5°C, so the entire part reaches ejection temperature simultaneously and cooling time is set by the average, not the worst case.
See our detailed guides on conformal cooling vs conventional cooling and conformal cooling channel design for full engineering specifications.
Because cooling time scales with the square of wall thickness (t ∝ s²), wall thickness reduction is the highest-leverage tool design decision for reducing cooling time. Redesigning a part to reduce maximum wall from 3 mm to 2 mm cuts cooling time by 56 percent — far more than any cooling system improvement can achieve on the original 3 mm design.
Practical approaches include coring out thick sections, replacing solid walls with ribbed structures (same stiffness, 50% less material and thickness), and using stepped wall transitions to eliminate thick bosses. Every millimeter saved in maximum wall thickness has a disproportionate positive effect on cycle time.
Reducing coolant temperature from tap water (20–25°C) to chilled water (6–12°C) increases the temperature driving force for heat extraction and lowers mold wall temperature. This is one of the most cost-effective improvements for an existing tool. A chiller with 10°C coolant output typically reduces mold wall temperature by 8 to 12°C versus tap water, reducing cooling time by 10 to 20% depending on the material and processing conditions.
Chilled water is especially beneficial for commodity resins like PP, HDPE, and ABS where low mold temperatures are compatible with part quality requirements. For engineering resins requiring elevated mold temperatures (PC, PA66), chilling is limited by the minimum mold temperature specification.
The convective heat transfer coefficient inside a cooling channel is 2 to 5 times higher under turbulent flow than under laminar flow. For a 10 mm diameter channel, turbulent flow (Reynolds number above 10,000) requires a flow rate of approximately 7 to 10 L/min. Many production tools run at 3 to 4 L/min — firmly in the laminar regime — limiting the heat extraction rate and raising effective mold temperature.
Increasing flow rate to achieve turbulent conditions is one of the simplest and cheapest cycle time improvements available. The investment is a higher-capacity coolant pump or manifold rerouting to reduce pressure drop. The heat transfer improvement can reduce effective mold wall temperature by 3 to 8°C, reducing cooling time by 5 to 12%.
P20 and H13 tool steel have thermal conductivity of approximately 25 to 30 W/m·K. Beryllium copper alloys (BeCu) have thermal conductivity of 100 to 130 W/m·K — four to five times higher. Replacing steel inserts at thermal hot spots (deep core pins, narrow shut-off features, fine cavity details) with BeCu dramatically increases local heat extraction rate.
BeCu inserts are most effective at localized hot spots where conformal channels physically cannot reach — internal core pins below 8 mm diameter, blade features, and pin gates. For such features, BeCu can reduce local cooling time by 30 to 50%, often eliminating the hot spot that was setting the overall cycle time.
Note: BeCu is considerably more expensive than steel, requires careful handling due to beryllium dust hazards during machining, and has lower hardness and wear resistance. It is best used as a targeted intervention at verified hot spots, not as a bulk mold material.
Many production molds run with cooling channels that are poorly located relative to the cavity surface. Standard design guidelines call for channel diameter of 8 to 12 mm, channel center depth of 1.5 to 2.0 times the channel diameter from the cavity surface, and pitch (channel center-to-center spacing) of 2.5 to 3.0 times the channel diameter. Channels placed too far from the cavity surface or spaced too widely leave under-cooled zones that extend cycle time.
When redesigning or building a new tool, following these geometry rules precisely can reduce cycle time by 10 to 20% compared to rules-of-thumb layouts. For existing tools, adding additional channels through steel modifications or new channel circuits is sometimes feasible and can recover significant cycle time at modest cost.
Pulsed cooling alternates between rapid chilled-water cooling during most of the cooling phase and a brief hot-water or steam pulse at the start of injection to achieve a hot mold surface for better surface replication. Variotherm systems maintain a hot mold during injection and packing (improving surface finish and eliminating weld lines) then rapidly switch to cold coolant for fast cooling during the majority of the cycle.
Variotherm is primarily used for high-gloss optical parts (PC, PMMA, ABS), fiber-reinforced resins where surface fiber exposure is unacceptable, and micro-molded parts with critical surface definition. It requires specialized tooling with thin mold walls for fast thermal response and a dedicated dual-circuit temperature control unit. The primary benefit is quality, but cycle time can also be reduced by 15 to 25% on programs that previously ran extended cooling to compensate for poor surface appearance at low mold temperatures.
Running at the low end of the recommended melt temperature range reduces total heat content entering the mold (Tm is lower) and therefore reduces the logarithmic term in the cooling time formula. For a PP part, reducing Tm from 250°C to 210°C shifts the logarithmic term from approximately 0.98 to 0.90 — a modest 8% reduction in cooling time. The effect is real but smaller than other strategies.
More importantly, running at lower melt temperature reduces cycle time, energy consumption, and thermal degradation risk simultaneously. The constraint is that lower melt temperature increases melt viscosity, which can cause incomplete fill on thin walls or flow lines on appearance surfaces. Optimize melt temperature in conjunction with injection speed and screw design for balanced results.
9. Mold Cooling System Design Basics
Designing an effective mold cooling system requires three decisions: channel diameter, channel depth from cavity surface, and channel pitch (spacing). Getting these parameters right can mean the difference between a cycle time set by the formula and a cycle time set by hot spots that should not exist.
Channel Diameter
Standard cooling channel diameters for injection molds range from 6 mm to 16 mm. For most production molds, 8 mm to 12 mm is optimal. Smaller channels have higher pressure drop (requiring more pump power to maintain turbulent flow) and lower total coolant capacity; larger channels require more material removal from the mold steel and reduce structural integrity near the cavity. The optimal diameter is 8 to 10 mm for small-to-medium parts and 10 to 12 mm for large parts requiring high total heat extraction.
Channel Depth from Cavity Surface
Channel center depth (distance from cavity surface to channel centerline) should be 1.5 to 2.0 times the channel diameter. For a 10 mm channel, this means 15 to 20 mm from the cavity surface. Shallower channels increase heat extraction rate but risk steel weakness and surface temperature non-uniformity (creating cold-spot banding); deeper channels reduce heat extraction rate and increase the temperature gradient from channel to surface. The 1.5D to 2.0D rule is validated by both simulation and production experience across thousands of mold designs.
Channel Pitch (Center-to-Center Spacing)
Channel pitch should be 2.5 to 3.0 times the channel diameter. For 10 mm channels, this means 25 to 30 mm center-to-center spacing. Closer spacing increases heat extraction uniformity but requires more channels (more machining cost and potential structural issues); wider spacing creates warm zones between channels and extends effective cooling time. The 3D pitch rule maintains surface temperature variation below approximately 5°C between channels for typical steel conductivity — a level that prevents thermally driven warpage in most parts.
For complex part geometries — deep ribs, cores, non-planar surfaces — conventional straight-drilled channels cannot meet these spacing and depth guidelines simultaneously. This is the geometry constraint that makes conformal cooling channel design necessary: 3D-printed channels can maintain the 1.5D depth and 3D pitch rules along any surface, regardless of its shape. The result is uniform heat extraction that conventional cooling channels simply cannot achieve on non-flat cavities.
10. When to Use Simulation vs. Hand Calculation for Cooling Time
Both hand calculation and full mold flow simulation serve legitimate engineering purposes for predicting and optimizing cooling time in injection molding. The choice between them depends on the accuracy required, the complexity of the part, and the stage of the design process.
Use Hand Calculation When:
- Preliminary feasibility: Estimating cycle time during part design to check if a proposed wall thickness is commercially viable. A 30-second calculation with the formula above gives 80 to 90% accuracy for uniform-wall parts.
- Sensitivity analysis: Quickly comparing cooling times for different wall thicknesses, materials, or mold temperatures. The formula makes these comparisons instantaneous and intuitive.
- Quoting: Estimating cycle time for a new program from a 2D drawing or DFM review before a CAD model is available.
- Simple part geometry: Parts with uniform or slowly varying wall thickness where the flat-plate assumption holds accurately.
Use Full Mold Flow Simulation When:
- Complex 3D geometry: Parts with deep ribs, variable wall thickness, internal cores, or non-planar surfaces where local hot spots will determine actual cooling time. The hand formula cannot identify where these hot spots are.
- Cooling channel design validation: Before cutting steel on a new tool or approving a conformal cooling channel layout. Simulation predicts mold surface temperature distribution, identifies under-cooled zones, and compares channel layout options quantitatively.
- Warpage prediction: Parts with tight flatness or dimensional tolerances where the distribution of cooling — not just the average — determines quality outcomes.
- Conformal cooling design: Optimizing conformal channel geometry requires 3D thermal simulation. The flat-plate formula cannot capture the advantage of channels that follow complex surface contours. Our team uses Moldflow simulation for every conformal cooling design we produce — results are provided with the insert at no additional charge.
- Engineering resins with complex thermal behavior: Crystalline materials like PA66, POM, and HDPE that release latent heat of crystallization during solidification require simulation for accurate cooling time prediction; the formula above does not account for latent heat.
Simulation is most valuable when you need to know not just how long cooling takes, but where heat concentrates, where warpage originates, and whether your channel layout is delivering uniform heat extraction. For any tool with a projected annual throughput savings above $50,000, the cost of a Moldflow simulation is recovered in the first day of production.
For programs where conformal cooling is being considered, MouldNova provides Moldflow thermal simulation of the proposed conformal channel design as part of the standard conformal cooling insert service. The simulation compares predicted surface temperature distribution, cooling time, and warpage for both the existing conventional channel layout and the proposed conformal design — giving you quantified data on the expected improvement before committing to tooling investment. See also our article on conformal cooling simulation workflow for a detailed look at this process.
11. FAQ — Injection Molding Cooling Time
The standard injection molding cooling time formula is: t = (s² / (π² × α)) × ln((8/π²) × (Tm − Tw) / (Te − Tw)), where t is cooling time in seconds, s is wall thickness in meters, α is thermal diffusivity in m²/s, Tm is melt temperature, Tw is mold wall temperature, and Te is ejection temperature — all in degrees C. This equation is derived from the analytical solution to one-dimensional transient heat conduction through a flat plate and is accurate for most injection-molded walls.
To calculate cooling time in injection molding: (1) Find the maximum wall thickness s in meters. (2) Look up thermal diffusivity α for your resin — PP: 0.087 × 10² m²/s; ABS: 0.100; PC: 0.115; PA66: 0.090. (3) Get Tm (melt temperature), Tw (mold wall temperature), and Te (ejection temperature) from material data sheets. (4) Calculate the s-squared term: s² / (π² × α). (5) Calculate the log term: ln((8/π²) × (Tm − Tw)/(Te − Tw)). (6) Multiply both terms. (7) Add 15 to 25% safety margin for the production set-point. See Section 5 of this article for two complete worked examples.
Injection molding cooling time is proportional to wall thickness squared (t ∝ s²) because heat must conduct from the center of the part wall to the cooled mold surface. The physics of transient heat conduction — described by Fourier's law — require time that scales with the square of the conduction distance, not linearly. This means doubling wall thickness from 2 mm to 4 mm quadruples cooling time, not doubles it. The s-squared relationship holds regardless of the cooling system, material, or mold temperature — it is a fundamental consequence of heat conduction physics. This makes wall thickness reduction the highest-leverage strategy for reducing cooling time.
Cooling time typically accounts for 60 to 70 percent of total injection molding cycle time. On a 30-second cycle, roughly 18 to 21 seconds are devoted to cooling, with 5 to 8 seconds for injection and packing, and 2 to 4 seconds for mold open/eject/close. Because cooling dominates the cycle, it is the primary target for cycle time reduction programs. Reducing cooling time by 30 percent reduces total cycle time by approximately 18 to 21 percent — directly increasing throughput and reducing per-part cost.
The eight most effective ways to reduce cooling time in injection molding are: (1) Conformal cooling channels — 3D-printed channels that follow part geometry — reducing cooling time 25 to 40%; (2) Thinner wall design — reducing wall thickness from 3 mm to 2 mm cuts cooling time by 56%; (3) Lower coolant temperature — chilled water (10°C) vs. tap water (25°C) saves 10 to 20%; (4) Turbulent coolant flow at Reynolds number above 10,000; (5) Beryllium copper inserts at localized hot spots; (6) Optimized channel geometry following the 1.5D depth and 3D pitch guidelines; (7) Pulsed/variotherm cooling for high-gloss and glass-filled parts; (8) Lower melt temperature within the processing window. Conformal cooling and wall thickness reduction typically offer the greatest absolute reduction.
Related Pages
- Conformal Cooling Cycle Time Reduction — Engineering Mechanisms and Production Data
- Conformal Cooling vs Conventional Cooling — Side-by-Side with 13 Real Projects
- Conformal Cooling Channel Design — Geometry, Layout, and Simulation Best Practices
- Conformal Cooling Simulation Workflow — From CAD to Validated Thermal Results
- Conformal Cooling Inserts — Service Details & Specifications
- Case Studies — Full Production Data from Real Programs