Conformal Cooling Design: When to Use It, Where to Put It, and How to Brief Your Manufacturer
- A scoring framework to decide whether conformal cooling is justified for your specific part
- The hybrid approach: which mold zones need conformal inserts and which don't
- Application-specific design approaches: thin-wall, deep core, optical, medical, automotive
- How to integrate conformal inserts into an existing mold design without redesigning the base
- Retrofit vs. new-mold design: when each makes sense
- Full specification checklist: what to send a manufacturer to get an accurate quote
Table of Contents
- Should You Use Conformal Cooling? A Scoring Framework
- The Hybrid Approach: Not Everything Needs Conformal
- Application-Specific Design Approaches
- Integrating Conformal Inserts into Mold Design
- Retrofit vs. New Mold Design
- Design Tradeoffs and How to Resolve Them
- Manufacturer Brief: What to Send for an Accurate Quote
- FAQ
Should You Use Conformal Cooling? A Scoring Framework
Conformal cooling adds cost and complexity. It is not the right answer for every mold — and applying it where it isn't needed is a waste of budget. The first design decision is whether to use it at all.
Use this scoring framework. Add up points based on your part and production characteristics:
| Total Score | Recommendation | Rationale |
|---|---|---|
| <20 | ✗ Do not specify | Conventional cooling is adequate; conformal cost cannot be recovered |
| 20–39 | ⚠ Marginal — evaluate ROI | May be justified; run a thermal simulation to quantify benefit before committing |
| 40–59 | ⚠ Likely justified | Conformal cooling will improve quality or cycle time; verify with Moldflow before specifying |
| 60+ | ✓ Strongly recommended | Conventional cooling will not solve the problem; conformal is the engineering-correct choice |
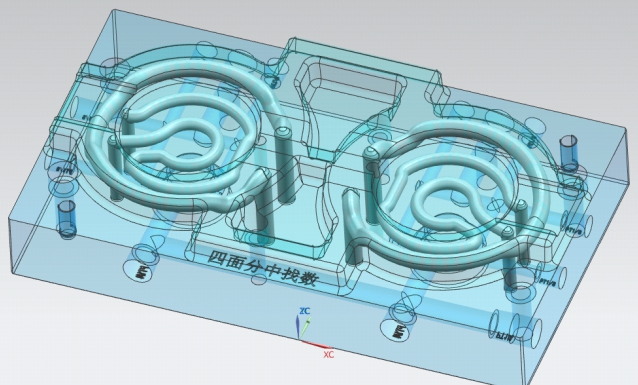
The Hybrid Approach: Not Everything Needs Conformal
The most cost-effective conformal cooling design is almost never "conformal cooling everywhere." It's targeted conformal inserts in the zones that need them, combined with conventional drilled channels everywhere else. This hybrid approach captures 70–90% of the total thermal performance benefit at 30–50% of the cost of full conformal.
Zoning your mold: where conformal inserts are justified
| Mold Zone | Conformal Insert? | Why |
|---|---|---|
| Deep cores (>30mm depth) | ✓ Always conformal | Drilled channels cannot enter core geometry; baffle inserts are inadequate; this zone controls minimum cycle time |
| Complex 3D cavity surfaces (undercuts, ribs, bosses) | ✓ Conformal where >20mm from nearest drilled channel | Drilled channels leave hot zones in geometrically complex areas; these cause warpage and sink marks |
| Thick sections (>4mm wall) | ✓ Conformal — zone these areas | Thick sections are rate-limiting for cooling; targeted conformal inserts at thick zones cuts cycle time most efficiently |
| Gate area (near injection point) | ✓ Often conformal (CuCrZr) | Gate area receives hottest material first; local overheating causes gate vestige and stringing |
| Flat cavity faces with uniform thin wall | Conventional — drilled channels adequate | Straight channels at correct pitch and distance work well for flat, uniform-thickness surfaces |
| Parting line areas, runner systems | Conventional | Accessible geometry; drilled channels reach easily; no thermal advantage to conformal |
| Ejector plate side (flat) | Conventional | Flat geometry with clear drilling access; ejector pins limit conformal channel routing options anyway |
Application-Specific Design Approaches
Conformal cooling design parameters and priorities differ significantly by application. A one-size-fits-all approach to channel diameter, wall distance, and routing produces mediocre results across all applications. Here's how to adjust the design for the five most common scenarios:

Automotive Structural Parts
Consumer Electronics / Class-A Surface
Medical / Optical Parts
Thin-Wall Packaging (<1.5mm wall)
Deep Core / Long Pin Geometry
High-Temperature Materials (PEEK, PPS)
Integrating Conformal Inserts into Mold Design
Conformal cooling inserts are drop-in components that fit into the existing mold base structure. They do not require redesigning the entire mold — only the specific zones being upgraded. Here's how integration works in practice:
Define insert boundaries based on hotspot zones
From Moldflow hotspot analysis, identify the minimum zone that needs conformal cooling. Draw the insert boundary to include that zone plus 15–20mm margin on all sides for structural integrity and sealing. The insert fits into a pocket machined into the mold base.
Design the insert pocket in the mold base
The mold base receives a precisely machined pocket with O-ring groove seals and coolant inlet/outlet passages. Pocket dimensions are toleranced to ±0.02mm for a press-fit insert interface. The insert has a positive register (step or dowel pin) to ensure it cannot shift during injection.
Route coolant connections
Inlet and outlet passages from the conformal insert connect to the mold base coolant circuit. For inserts replacing existing conventional zones: the new conformal circuit runs in parallel with or replaces the existing drilled circuit in that zone. Isolate conformal circuits from conventional circuits where independent temperature control is needed.
Retain ejector pin and guide pin clearances
Channel routing must avoid ejector pin locations — typically specified in the mold layout. Guide pin and guide bush clearance zones are no-channel areas. This constraint must be given to the conformal insert designer before channel routing begins, not after.
Specify cavity surface finish on the insert
The cavity-facing surface of the conformal insert must be polished to the same specification as the rest of the mold cavity (e.g., SPI A2, VDI 18). This is post-print CNC and polishing work. Specify the exact SPI or VDI standard in the drawing — "polished" is not a specification.
Verify thermal isolation or connection between zones
If the conformal insert runs at a different temperature than the surrounding mold steel (e.g., a hot PC tool with a cold gate insert), specify an air gap or insulating plate between the zones. Without thermal isolation, heat conducts across the interface and degrades both zones' temperature control.
Working on a mold design and unsure where conformal inserts belong?
Share your part file and current mold layout. Our engineers will identify the optimal insert zones, estimate the performance gain per zone, and provide a cost breakdown — before you commit to the design.
Retrofit vs. New Mold Design
One of the most valuable and underused applications of conformal cooling is retrofitting existing molds — replacing the problematic zones in an already-running mold with conformal inserts. This is often the right first step before committing to a full new-mold design.
Retrofit Conformal Insert
- Replace only the problem zone (core, hotspot area)
- Mold base, runner, ejector, sliders unchanged
- Cost: 15–35% of new mold cost
- Lead time: 10–16 days for insert
- Risk: low — existing mold structure proven
- Achieves 70–90% of a purpose-designed conformal mold's performance
- Easy to justify: clear before/after comparison available
New Mold with Conformal Design
- Conformal cooling designed in from the start
- Full thermal optimization — no legacy constraints
- Channel routing optimized without retrofit compromises
- Higher upfront cost — full mold investment
- Lead time: full mold lead time (30–60+ days)
- Best possible performance — no legacy constraint
- Required when geometry makes retrofit impossible
The retrofit decision test
Before committing to a new mold, ask three questions:
- Is the quality/cycle problem localized? If yes (one core, one zone), a retrofit insert addresses it without touching the rest of the mold.
- Is the existing mold base in good condition? If the mold base, sliders, ejector system, and runner are all functioning correctly and have remaining life, a full new mold is wasteful.
- Can a conformal insert physically fit? Some mold zones are too small or too constrained by surrounding components (ejector pins, guide pins) to accommodate an insert with internal channels. If the constrained zone is the problem zone, a new mold with redesigned layout may be required.
Design Tradeoffs and How to Resolve Them
| Tradeoff | Tension | Resolution |
|---|---|---|
| Wall distance vs. cooling effectiveness | Thinner wall = better cooling but higher crack risk | Use FEA to validate structural integrity at 1.0×D wall distance. Upgrade to 18Ni300 if 420 SS FEA shows stress concentration. Only increase wall distance if FEA confirms structural requirement — not as a default precaution. |
| Pitch density vs. cost | Tighter pitch = more uniform temperature but more channels = higher print cost | Run Moldflow at 2.5×D pitch (standard). Only tighten to 1.8×D if simulation shows temperature non-uniformity >±4°C. Tighter pitch in hotspot zones, standard pitch elsewhere — zone-dependent pitch is acceptable in one insert. |
| Conformal coverage area vs. insert count | One large insert is cheaper per area; multiple small inserts give targeted control | One insert per thermal zone where independent temperature control is needed. Combine zones running at the same temperature into one insert. Never combine a hot zone (PC, 80°C) and a cold zone (PP, 25°C) in one insert — they'll fight each other. |
| Spiral core vs. series routing | Spiral covers core tip better; series is simpler to design and validate | Use spiral routing for all cores deeper than 30mm. Use series/conformal routing for cavity faces. Never use series routing for a deep core — it misses the tip, which is exactly where the heat concentrates. |
| Material cost (18Ni300 vs. 420 SS) | 18Ni300 is 40–60% more expensive but has superior properties | Use 420 SS as default. Upgrade to 18Ni300 when: wall thickness <8mm (thin-wall inserts need higher strength), glass-filled abrasive plastics (>20% glass), or >8 cavities with high clamping force. CuCrZr only for targeted inserts in maximum-heat zones. |
Manufacturer Brief: What to Send for an Accurate Quote
The quality of a conformal cooling insert quote depends entirely on the information provided. Use our RFQ checklist as a starting point. Incomplete briefs result in over-conservative designs (channels too far from surface), wrong material selection, or missed constraints that require expensive re-design after printing. Here's a complete brief checklist:
📁 Required Files Required
- Part STEP file (the plastic part being molded)
- Insert boundary drawing — the zone you want as a conformal insert, with overall dimensions
- Mold layout showing: ejector pin locations, guide pin positions, existing waterline routing, parting line
🎯 Processing Information Required
- Plastic material (full grade: e.g., "PA66-GF30, Lanxess Durethan BKV30H2.0")
- Melt temperature and mold temperature target
- Current cycle time and cooling time (if running in existing mold)
- Primary defect you're trying to solve (warpage, burn marks, cycle time, multi-cavity balance)
- Annual production volume (shots/year)
🔧 Mold Integration Specs Required
- Insert pocket dimensions and tolerance (±0.02mm recommended for mating surfaces)
- Cavity surface finish requirement (SPI standard: A1/A2/B1/B2 or VDI number)
- Fitting thread standard: BSP (metric) or NPT (US/inch) — and connection size
- Operating coolant pressure (bar)
📊 Helpful Additions Optional but Speeds Quote
- Moldflow simulation results showing hotspot zones (temperature map at end of pack)
- Photo or drawing of existing cooling in the problem zone
- Competitor insert drawing if this is a replacement order
- Target cycle time reduction (e.g., "from 42s to under 28s")
- Budget range — helps manufacturer recommend 420 SS vs. 18Ni300 appropriately
Ready to Start Your Conformal Cooling Design?
Send your part file and mold layout. We'll confirm which zones need conformal inserts, recommend insert material and geometry, and quote with full lead time — within 24 hours of receiving your files.
Frequently Asked Questions
When should I specify conformal cooling in my mold design?
Should the whole mold use conformal cooling or only specific inserts?
How does conformal cooling design differ for thin-wall vs. thick-wall parts?
What information do I need to provide to a conformal cooling manufacturer?
Can conformal cooling inserts be retrofitted into an existing mold?
Related Articles & Pages
- Conformal Cooling Channel Design: Parameters, Geometry & Workflow
- Conformal Cooling Channels: Commissioning, Maintenance & Troubleshooting
- Conformal Cooling in Injection Molding: Cycle Time & ROI Data
- Conformal Cooling 3D Printing: SLM Process, Materials & Cost
- Our Conformal Cooling Insert Service — Get a Quote